Air Keyboard
Windows firewall settings
This instruction will help you configuring Windows Firewall to allow Air Keyboard to work.
The instruction was tested on Windows 8, however the user interface of the firewall is almost the same in older Windows versions including Windows 7, Vista and XP and most likely the instruction is applicable to these versions.
If you have any difficulties or questions regarding to the Windows Firewall settings — please write us at [email protected] and we'll be happy to help you.
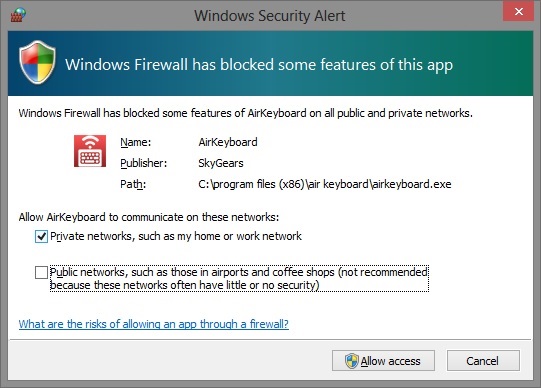
Step 0. Windows Security Alert.
When you run Air Keyboard first time Windows will show the standard firewall dialog.
Please make sure that "Private networks..." is checked and click "Allow access" button.
Step 1. Windows Firewall.
If you occasionally skipped the previous window, or have not checked all the checkboxes, the firewall can be configured manually.
Open the "Control Panel".
Then click "System and Security" link and then "Windows Firewall".
(On Vista/7/8 you can just press Windows Start button and type "Windows Firewall" then push Enter key).
The following window should appear:
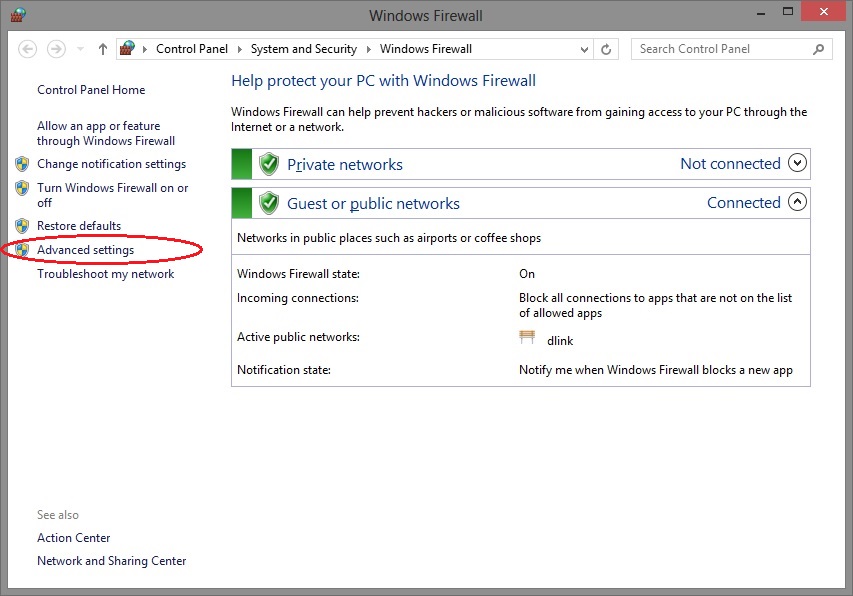
Click "Advanced settings" link.
Step 2. List of inbound rules.
The following window should appear:
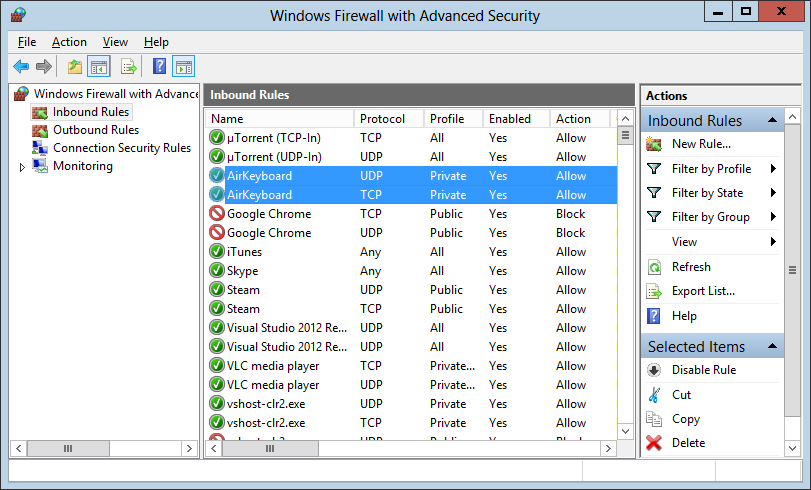
Click on "Inbound rules" tree node in the window and find a rule named "AirKeyboard".
There should be two rules — one for UDP protocol and one for TCP protocol. You could find the protocol column if you scroll right in the list.
If you were able to find that rules, go to Step 3.
Otherwise click "New Rule..." link at the right pane called "Inbound Rules". A wizard will be opened then.
We described all the wizard steps you need to follow at the New Rule Wizard instruction.
Step 3. General tab.
Double click the first "AirKeyboard" row in the list.
The following window will appear:
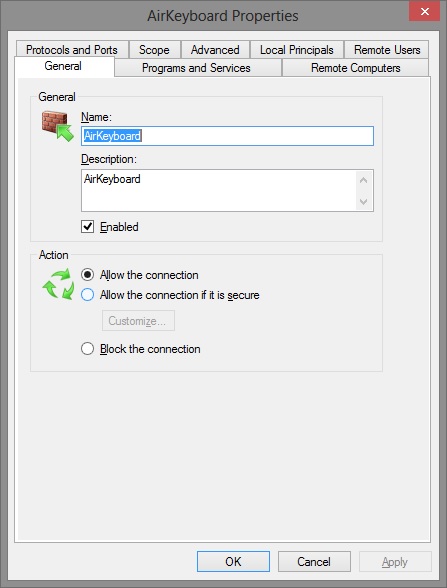
Ensure that "Enabled" checkbox and "Allow the connection" checkbox are set.
Step 4. Programs and Services tab.
Please click the "Programs and Services" tab, the following window will appear:
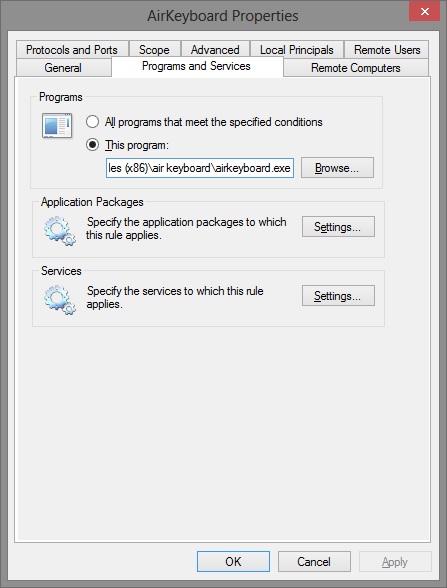
Ensure (visually) that the textbox after "This program" checkbox contains the correct path to the Air Keyboard program you installed to your PC.
Usually the path is "C:\Program Files\Air Keyboard\airkeyboard.exe" on 32-bit Windows or "C:\Program Files (x86)\Air Keyboard\airkeyboard.exe" on 64-bit Windows.
Of cource if you changed the installed path during the Air Keyboard installation, the correct path should be displayed there also.
Step 5. Protocols and Ports.
Click the "Protocol and Ports" tab. The following window should appear:
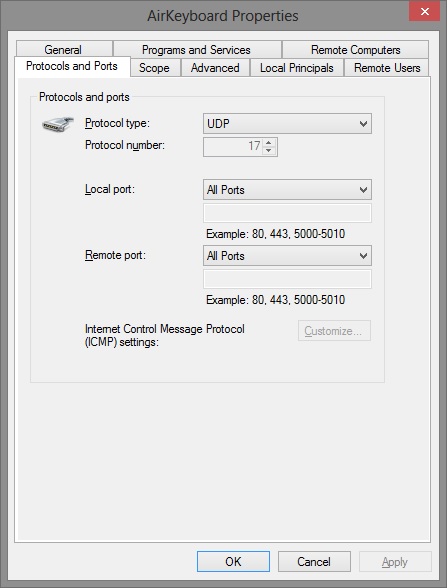
Ensure that the protocol is UDP and Local port and Remote port are set to "All ports".
For the second inbound rule the protocol should be TCP.
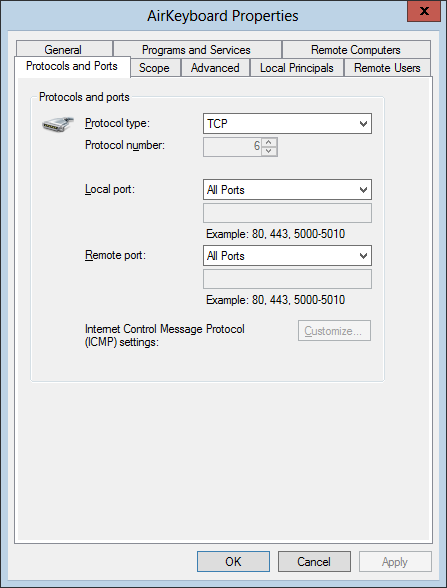
If the information of your rule differs, then you have to re-create the rule in the correct way — for this, close the properties window, click "New Rule..." link, follow the New Rule Wizard instruction to create a rule from scratch and go to Step 3 to ensure that the rule is configured correctly.
Step 6. Advanced.
Click the "Advanced" tab.
The following window should appear:
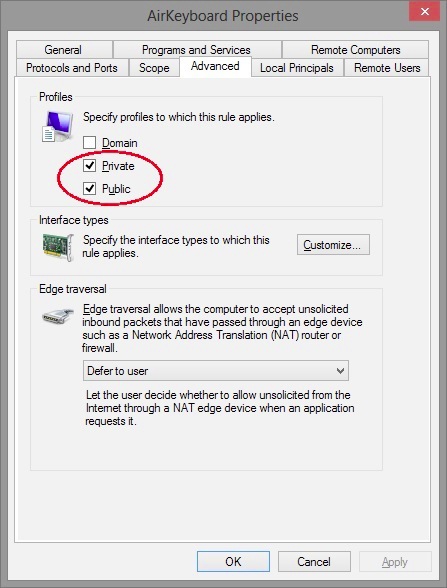
Ensure that the "Private" and "Public" checkboxes are set in the "Profiles" group.
Step 7. Applying changes.
Click the OK button to confirm your changes.
Then restart the Air Keyboard program: find its icon at the system tray, click it, click "Exit" and start the Air Keyboard program from the Windows Start Menu.
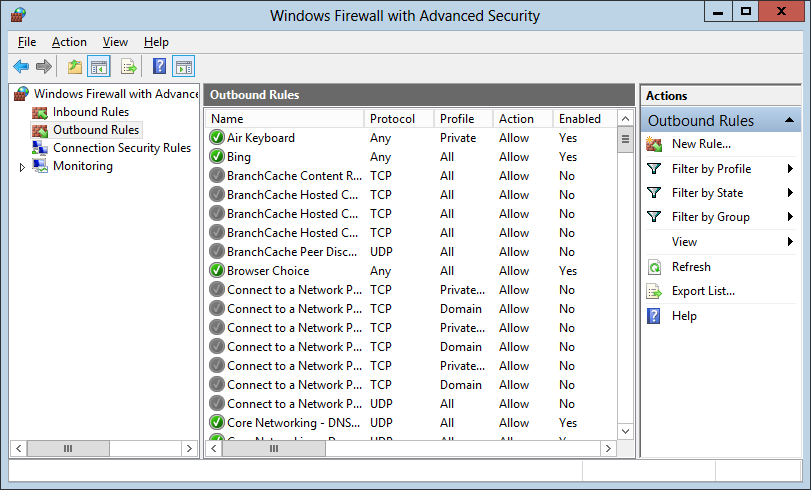
Step 8. Outbound rule.
Normally you do not have to add an outbound rule. However, if you do not see your computer in the list of servers or the mobile app does not work, you may add an outbound rule to allow outgoing connections for Air Keyboard.
If you sill do not see your PC in the mobile application — in 99% cases it is caused by another firewall/antivirus you have and/or your Wi-Fi router.
We will be happy to solve the problem — please email our tech support at [email protected] and we'll answer as soon as possible.